How it works
Invoice Now reads directly from Notion. No duplicate data entry. Your database is your invoice.
Set up your Notion database
Create a Notion database for your client—for example, "Acme Corp". Invoice Now will automatically discover any database that has the required columns.
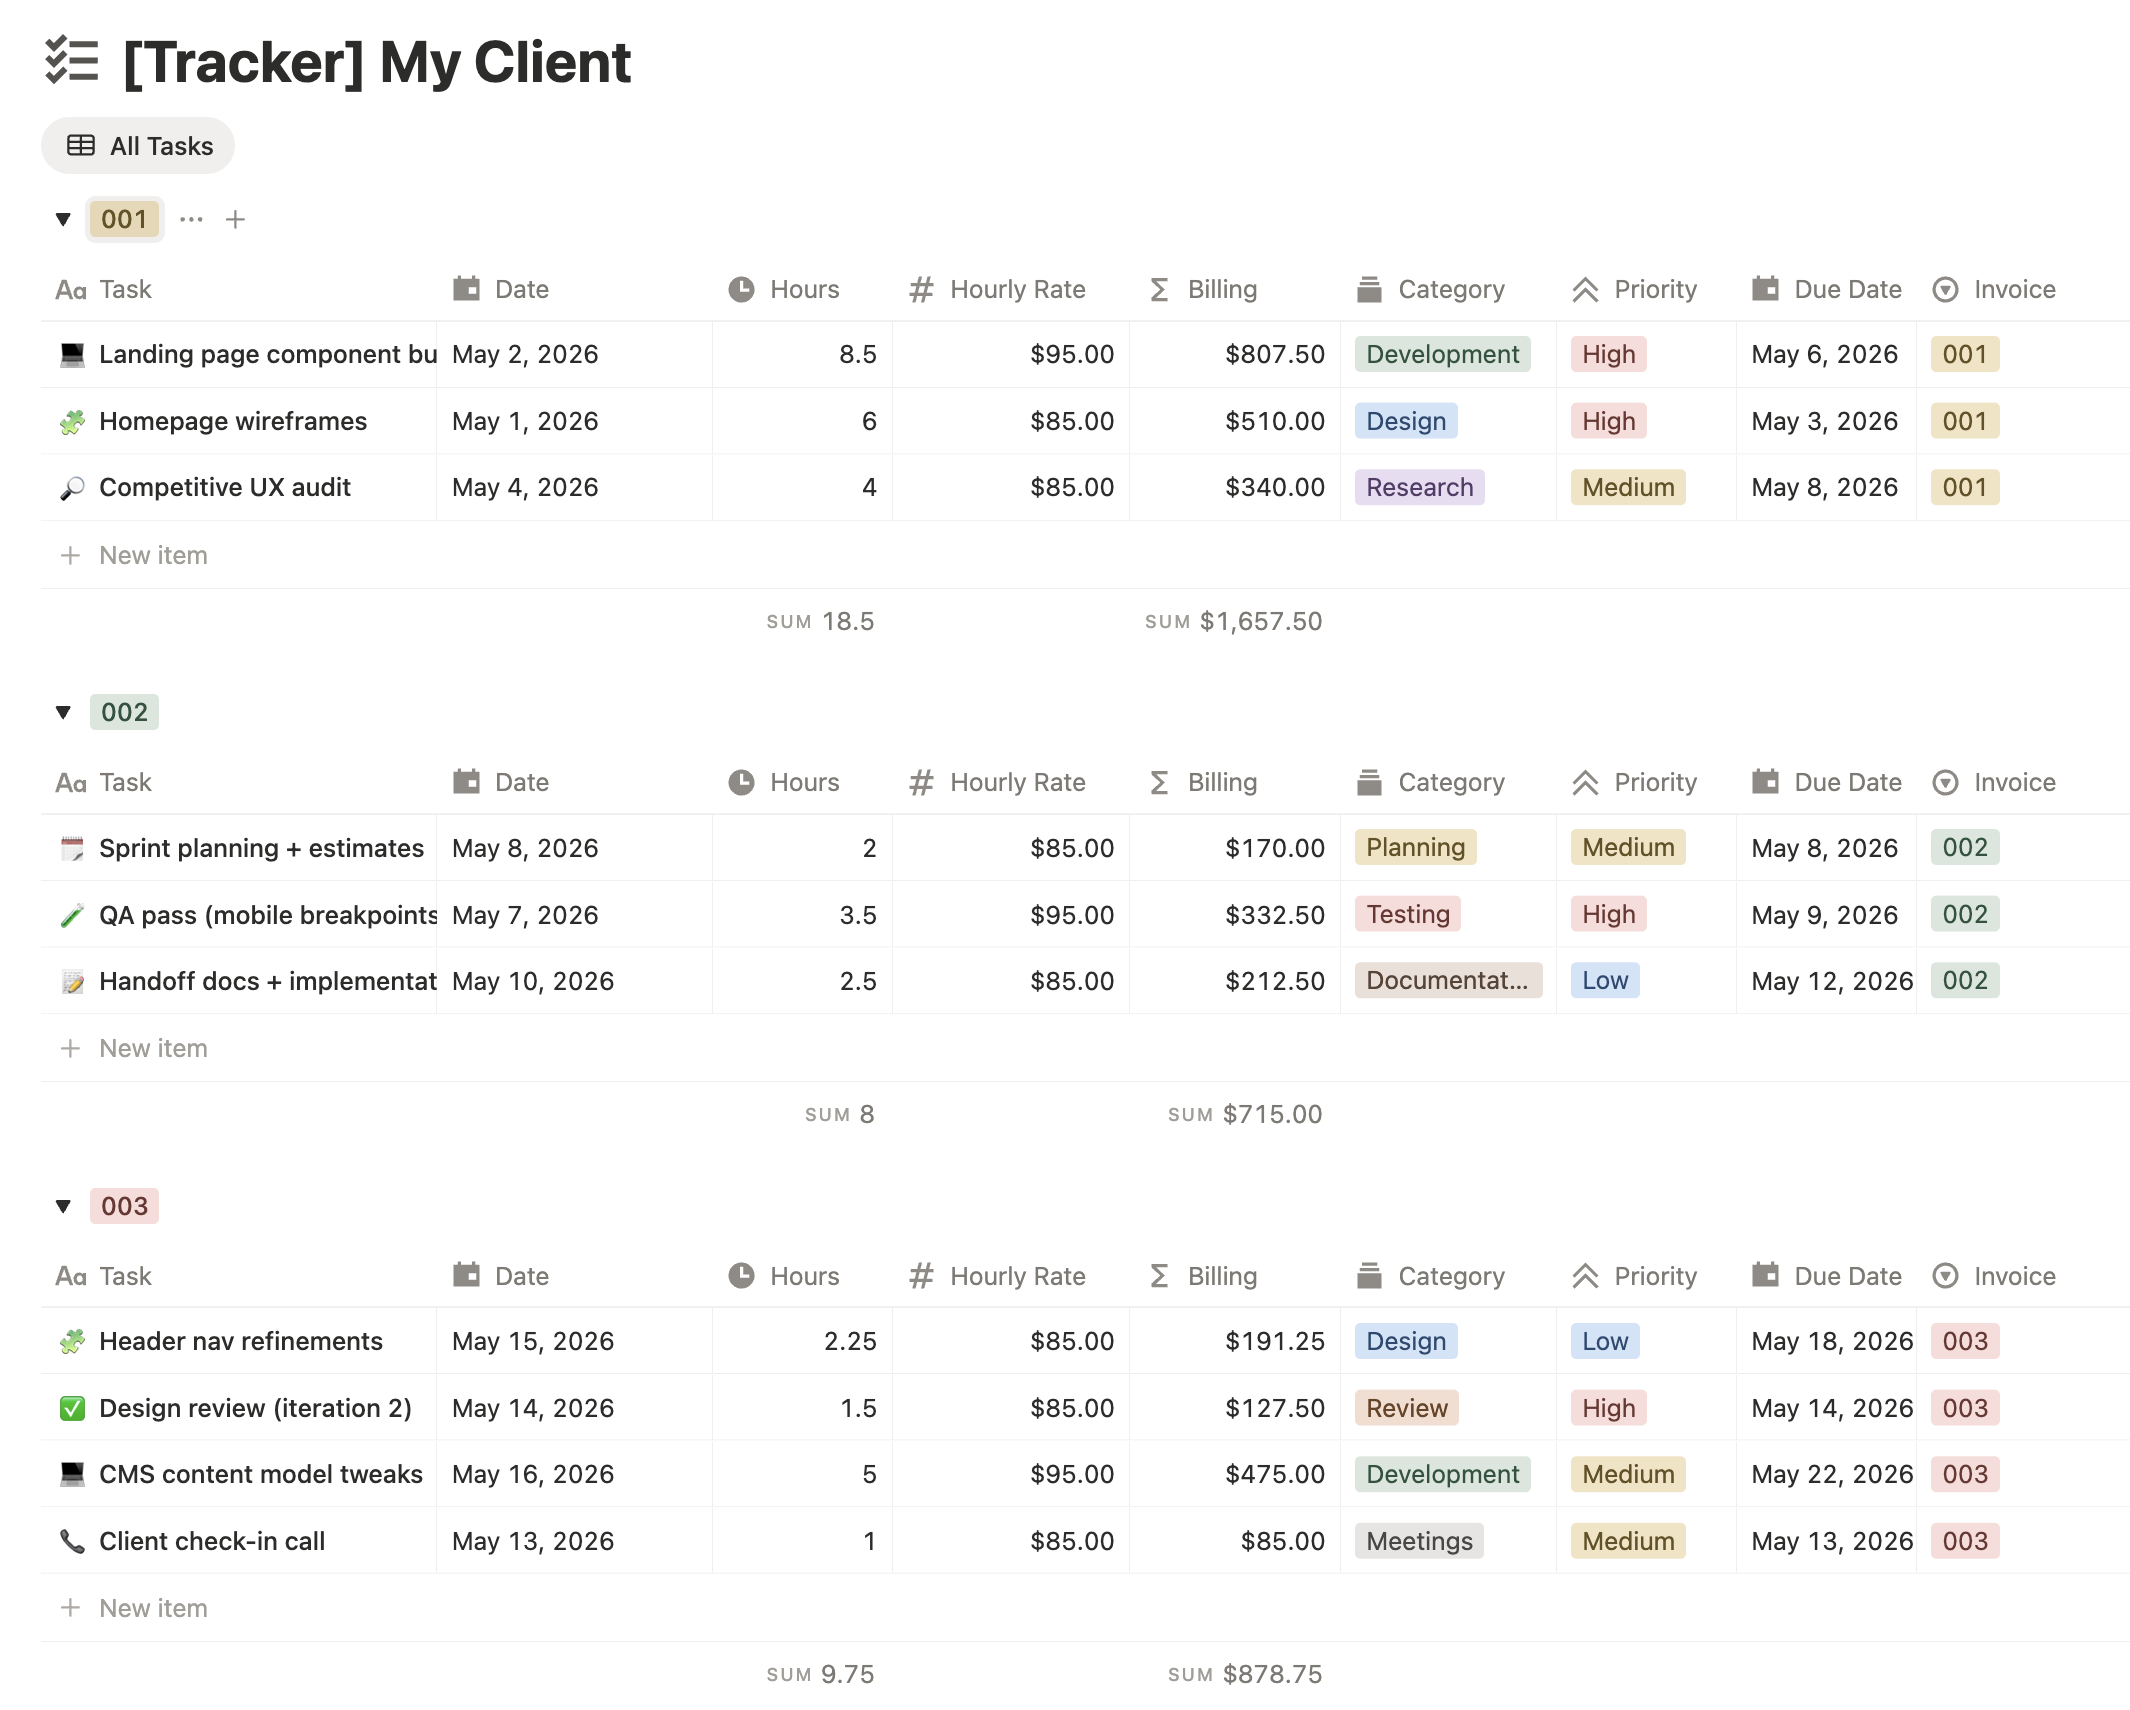
Each row represents a task or work item. The database must have at minimum: an Invoice column (text) and a Billing column (number). Optional: Task, Hours, Category, Date, Due Date. Or, duplicate the database template here.
Connect your Notion account
Click "Connect Notion" and authorize Invoice Now via Notion OAuth. No passwords are stored — only a secure access token scoped to your workspace.
You can disconnect at any time from the Connect page. Re-connecting re-authorizes with a fresh token.
Customize your profile
On the invoices page, click "Edit" next to your name to update your logo, brand color, name, email, website, phone, and address. These appear on every invoice.
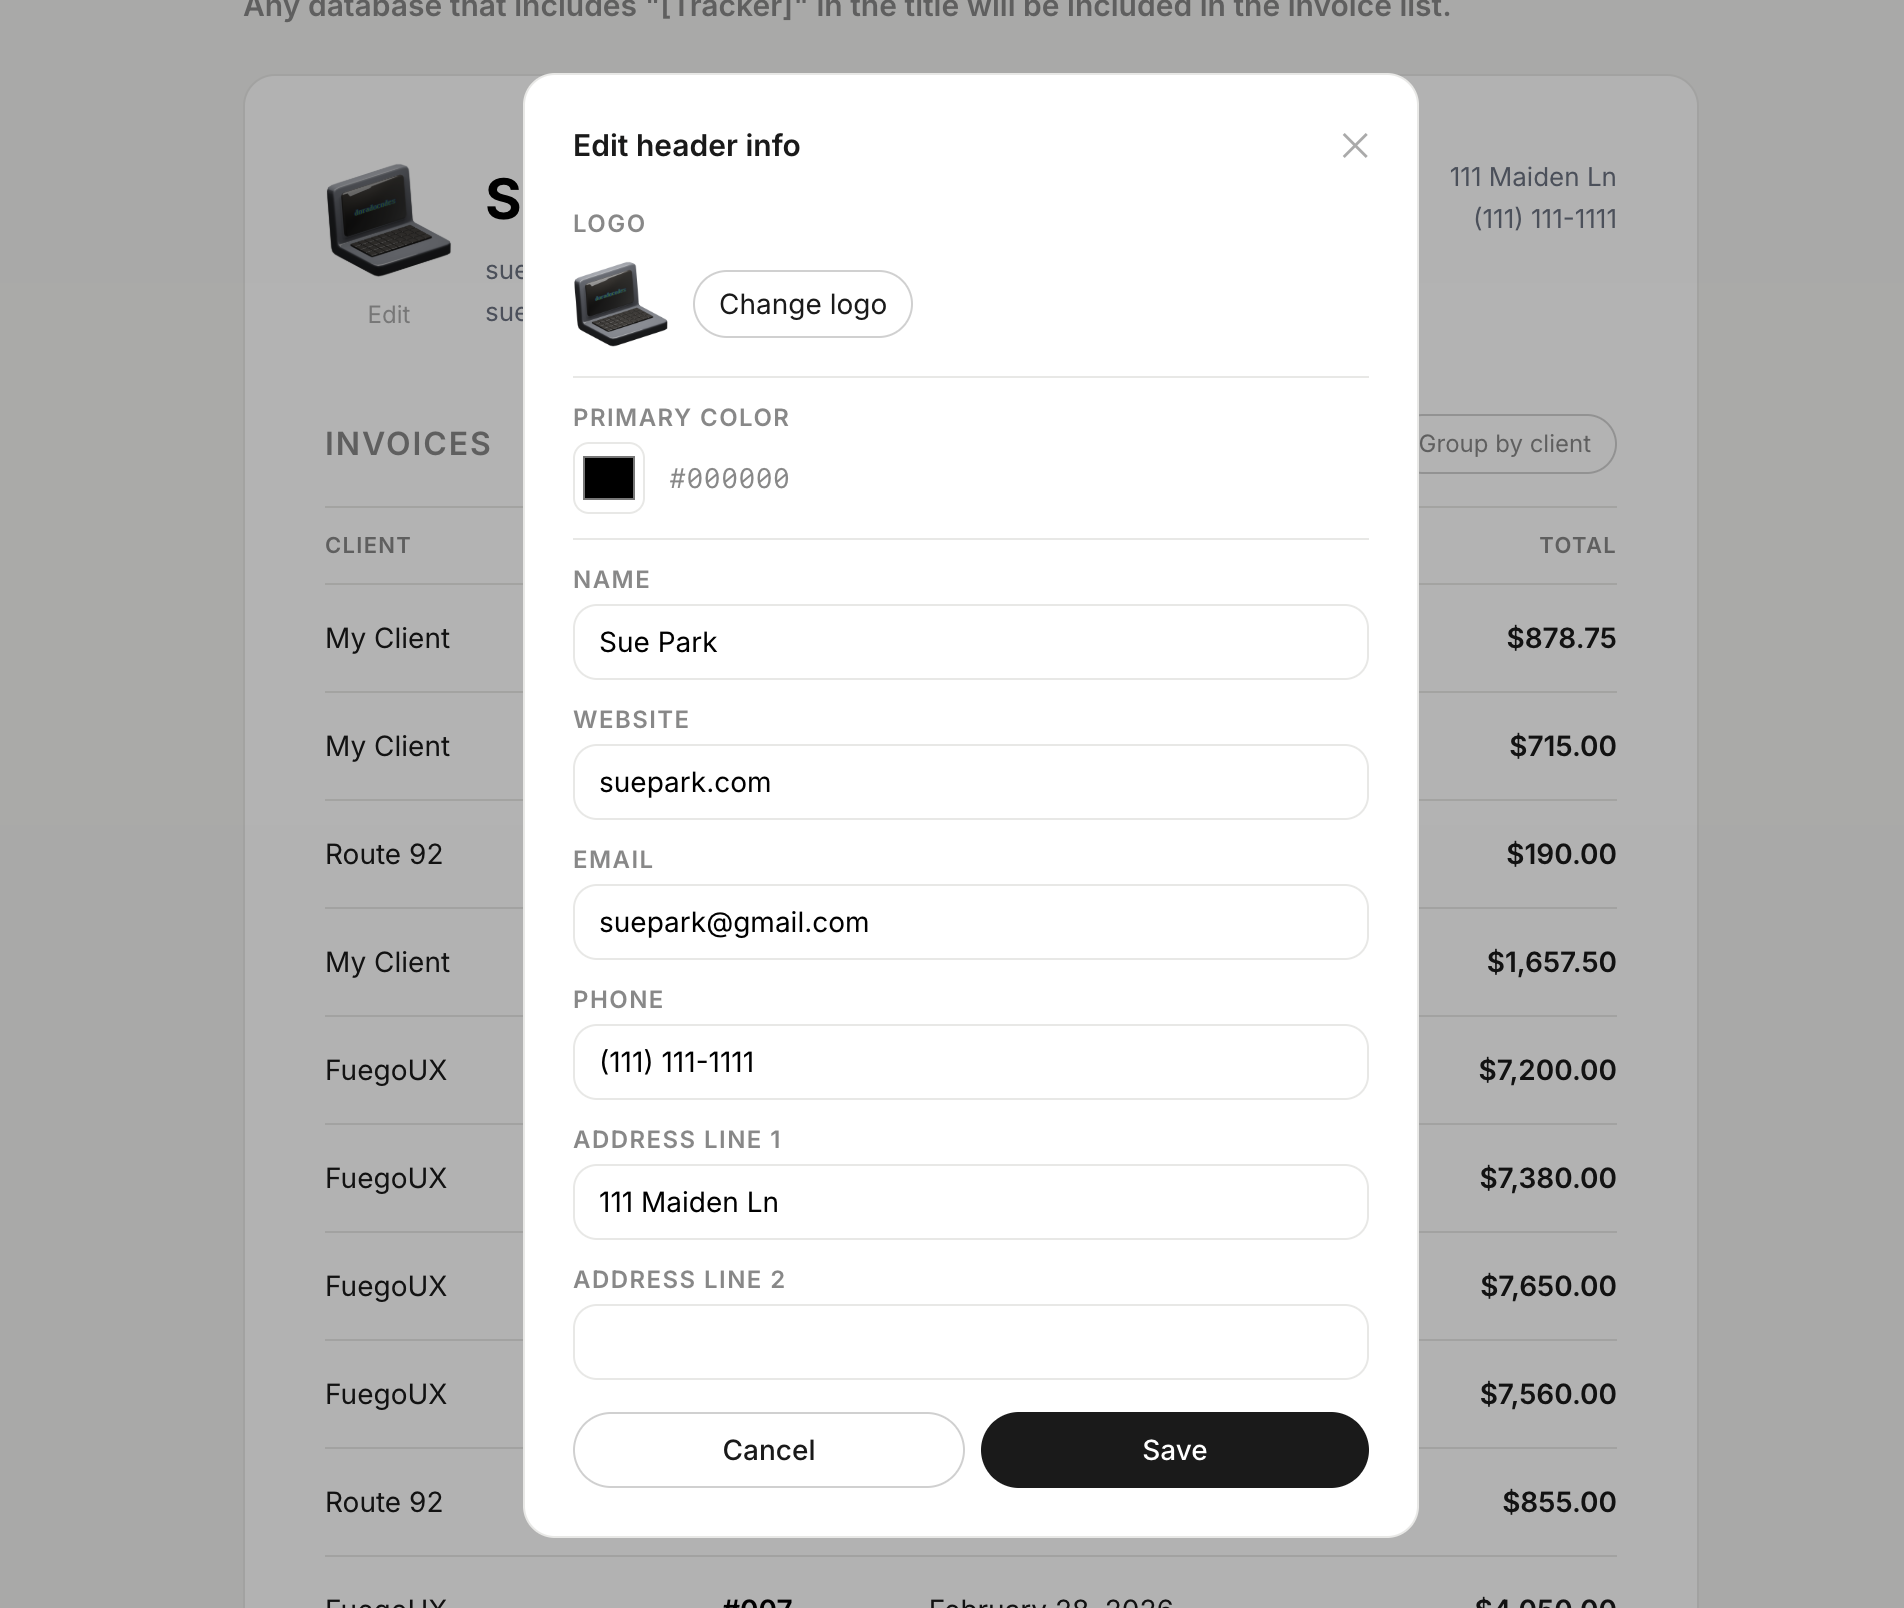
Your profile is stored as a browser cookie — no account or server-side storage needed.
View your invoice list
Once connected, Invoice Now scans your workspace and lists every invoice it finds — from any database that has Invoice and Billing columns.
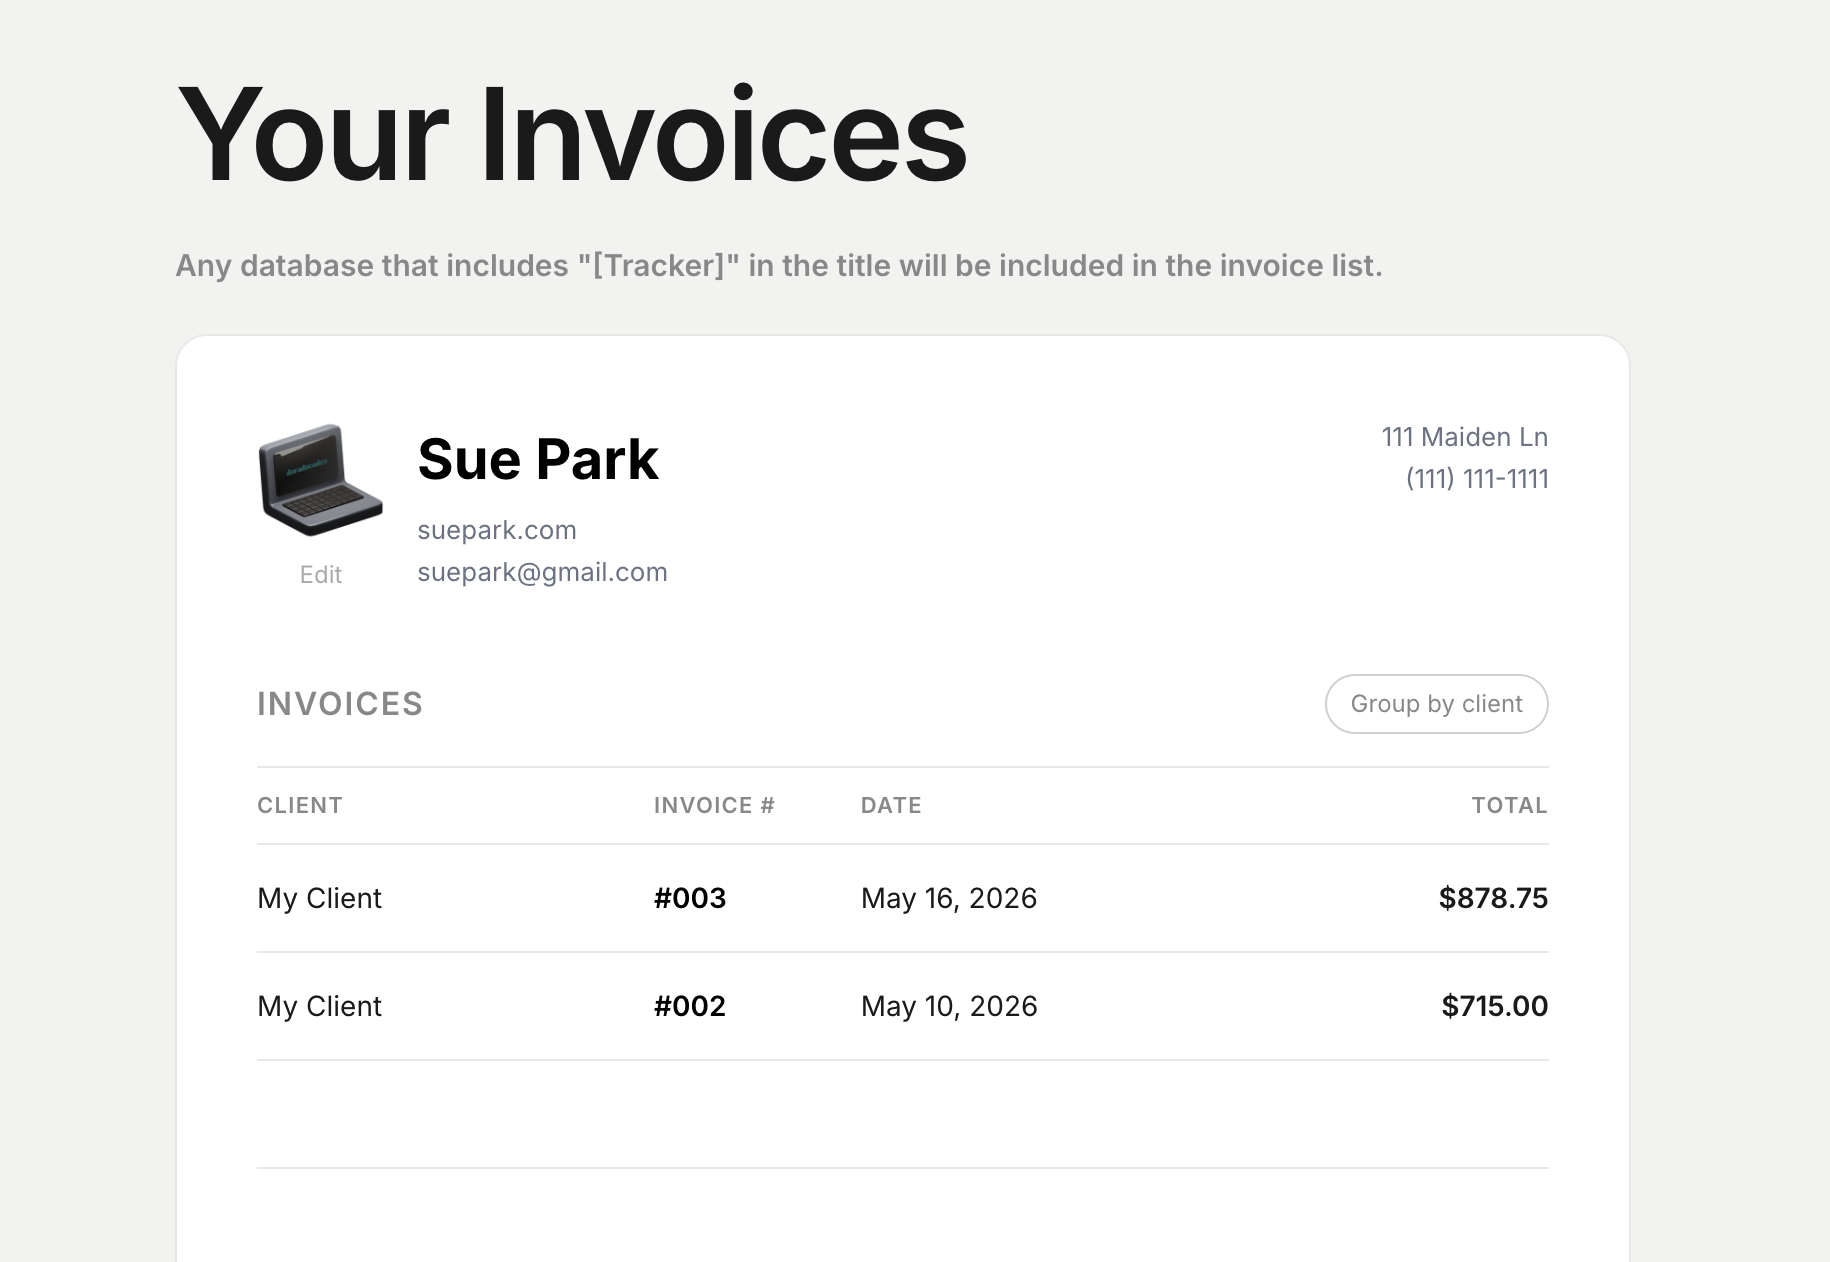
Use "Group by client" to organize the list by client name. Each row links directly to the full invoice view.
Open and review an invoice
Click any invoice number to open the full invoice view. It shows your profile header, billing details, line items broken down by category, and the total amount.
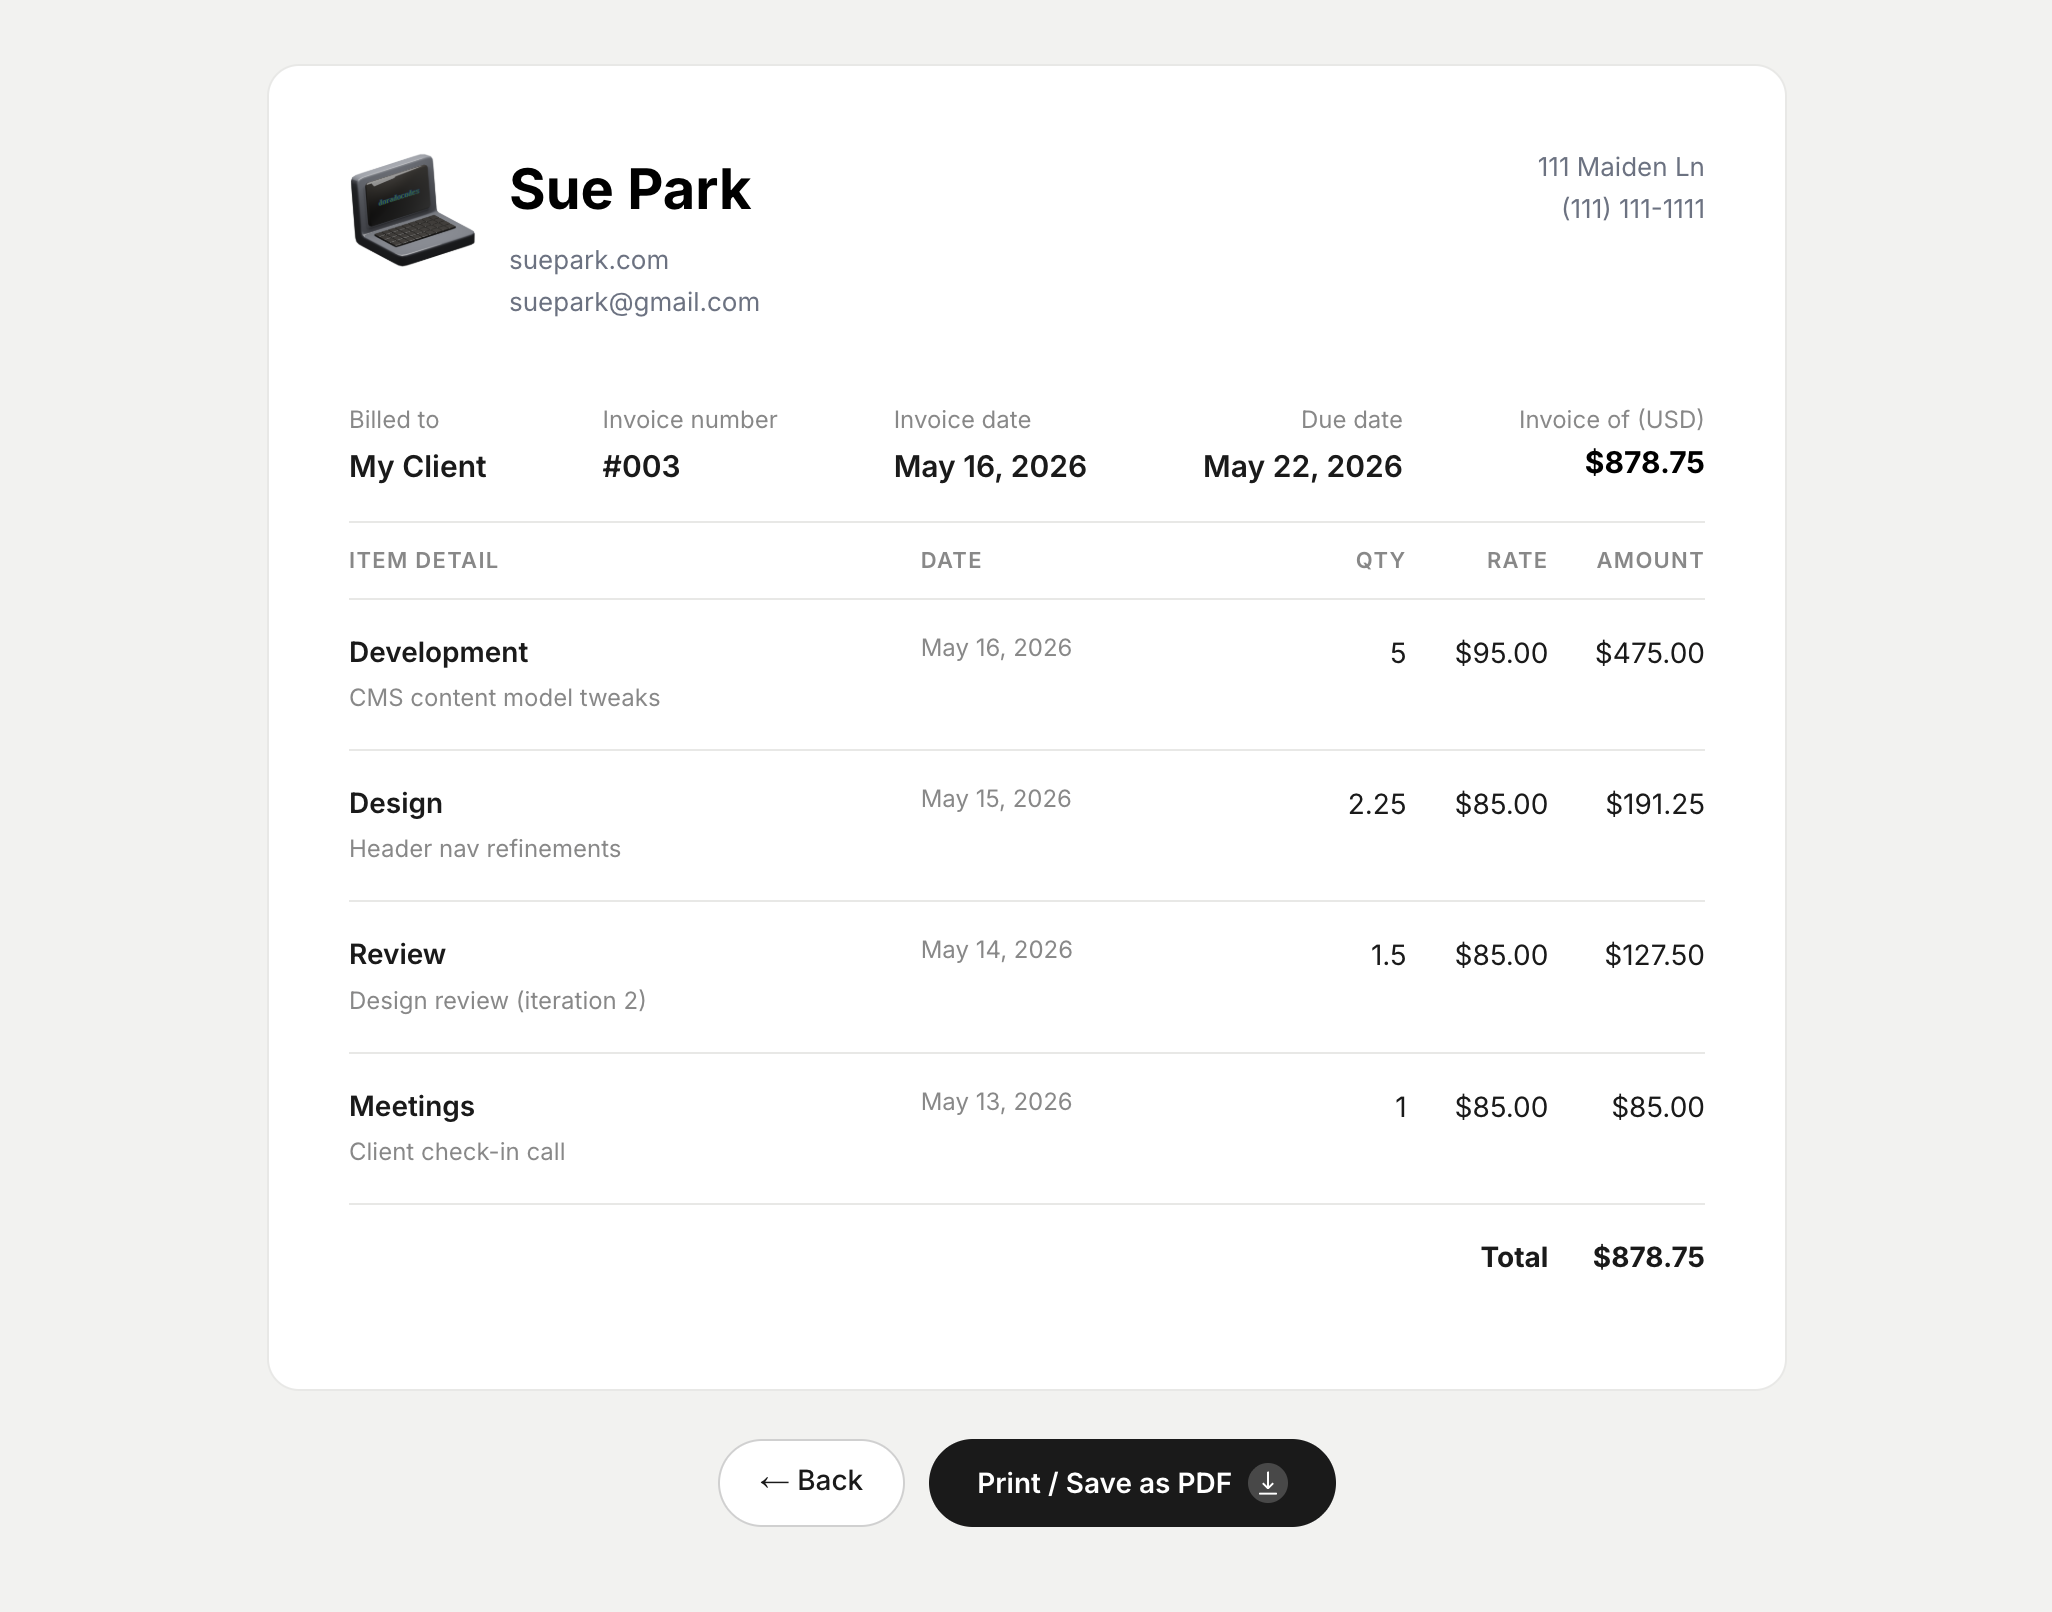
Line items are grouped by category. Each shows the tasks, date range, hours, rate, and amount billed.
Print or export as PDF
On any invoice page, click "Print / Save as PDF". Your browser's print dialog opens with the layout optimized for letter-size paper. Save as PDF to share with clients.

The print layout hides navigation and buttons automatically, leaving only the invoice content.